


対象読者
・phpの基礎は理解している
・Laravelを使って簡単なアプリを実装したい
・Vue.jsを使った開発について知りたい
・Pusherの使い方を理解したい
始めに
udemyの講座を参考にしています。(無料ですが、講師がインドの方で全て英語です)
講座のlaravelのバージョンが5.4と少し古いので、8.xでも実装できるようにしています。
ログインの機能については解説されていなかったので、この記事でログイン部分の解説を入れています。
Chatプロジェクトの作成
laravelプロジェクトの作成
↓
表示するページの作成
↓
bootstrapインストール
↓
Vue.jsインストール
を行います。
laravelプロジェクトの作成
laravel new Chat
cd Chat
↓
php artisan serve
npm install
↓
npm run dev
ファイルの作成
resources/views/chat.blade.php
※以下のhtmlコードをphpファイルで作成
<!DOCTYPE html>
<html lang="en">
<head>
 <meta charset="UTF-8">
 <meta name="viewport" content="width=device-width, initial-scale=1.0">
 <meta http-equiv="X-UA-Compatible" content="ie=edge">
 <title>Document</title>
 <link rel="stylesheet" href="{{ asset('css/app.css') }}">
</head>
<body>
 <div class="container">
  <div class="row">
   <h1>Chat room</h1>
  </div>
 </div>
 <script src="{{ asset('js/app.js') }}"></script>
</body>
</html>
routes/web.php
<?php
use Illuminate\Support\Facades\Route;
Route::get('/', function () {
 return view('welcome');
});

Route::get('chat', function(){
 return view('chat');
});
bootstrapインストール
npm install bootstrap
↓
npm install
↓
npm run dev
ERROR in ./node_modules/bootstrap/dist/js/bootstrap.esm.js 6:0-41
Module not found: Error: Can’t resolve ‘@popperjs/core’ in ‘D:\GitHub\chat\node_modules\bootstrap\dist\js’
以下を実行
Vue.jsのインストール
composerコマンドでフロントエンド開発のベースを簡単にしてくれます。
以下のコマンドでvue.jsを使えるようにします。
※ –authオプションを付けると認証機能も同時にインストールされます。
※講座では上記2つコマンドを実行していないですが、こちらを実行しておくと楽です。
再度、npm run devを実行
Chat(メッセージ)送信機能の実装
resources/views/chat.blade.php
入力したメッセージを表示する<message>タグとメッセージを入力する<input>タグを追加。
<!DOCTYPE html>
<html lang="en">
<head>
 <meta charset="UTF-8">
 <meta name="viewport" content="width=device-width, initial-scale=1.0">
 <meta http-equiv="X-UA-Compatible" content="ie=edge">
 <title>Document</title>
 <meta name="csrf-token" content="{{csrf_token()}}">
 <link rel="stylesheet" href="{{ asset('css/app.css') }}">
 <style>
  .list-group{
   overflow-y: scroll;
   height: 200px;
  }
 </style>
</head>
<body>
 <div class="container">
  <div class="row" id="app">
   <h1>Chat room</h1>
   <div class="offset-4 col-md-4">
    <li class="list-group-item active">Chat</li>
    <ul class="list-group">
     <message v-for="value in chat.message">
      @{{value}}
     </message>
    </ul>
    <input type="text" class="form-control" placeholder="Type your message here.." v-model='message' @keyup.enter='send'>
   </div>
  </div>
 </div>
 <script src="{{ asset('js/app.js') }}"></script>
</body>
</html>
resources/js/app.js
app.jsファイルをjsフォルダ内に作成する。
require('./bootstrap');

window.Vue = require('vue').default;

Vue.component('message', require('./components/Message.vue').default);

const app = new Vue({
 el: '#app',
 data:{
  message:'',
  chat:{
   message:[]
  }
 },
 methods:{
  send(){
   if(this.message.length !=0){
    this.chat.message.push(this.message);
    this.message = '';
   }
  },
 }
});
resources/components/Message.vue
<template>
 <li class="list-group-item "><slot></slot></li>
</template>

<script>
 export default {
  mounted() {
   console.log('Component mounted.')
  }
 }
</script>
php artisan serve
http://127.0.0.1:8000/chat
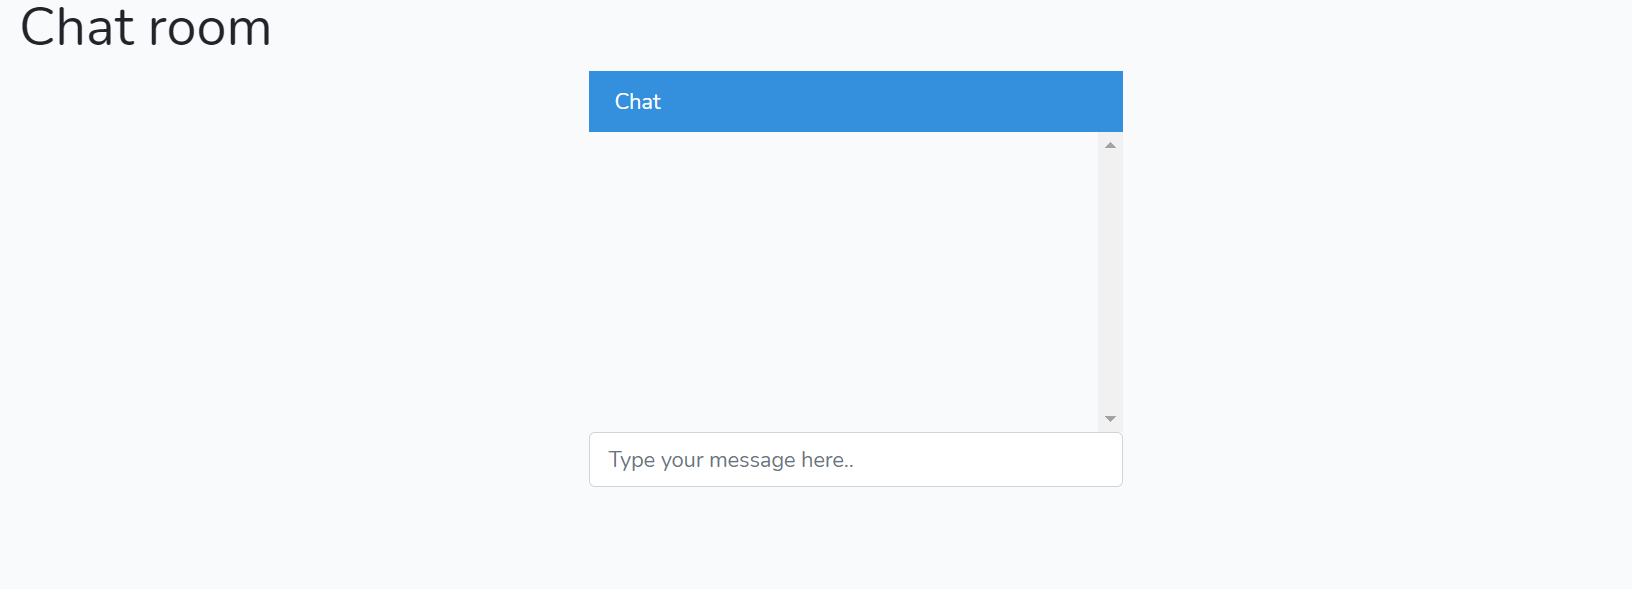
テキスト入力欄とスクロールバーが表示されていればOKです。
テキストを何回か入力すると以下のような感じになります。

スクール追従機能の実装
このサイトに書いてある通りに以下を実行していきます。
https://www.npmjs.com/package/vue-chat-scroll
resources/js/app.js
以下のコードを追加する。
import Vue from 'vue'
import VueChatScroll from 'vue-chat-scroll'
Vue.use(VueChatScroll)
chat.blade.php
v-chat-scrollを<ul>タグの中に記載する。
<ul class="list-group" v-chat-scroll>
Event to Broadcast
laravel Echo(JavaScriptライブラリ)が、ブラウザ内でeventを受信できるように、laravel event をbroadcastするサーバ側ドライバーによって実行されます。
laravelですぐに使用できるbroadcastするドライバーにPusherチャンネルとRedisがあり、今回Pusherを利用します。(※Pusherについては後述)
参考ドキュメント
※これ以降もlaravel公式ドキュメントに従い、実装していきます。
以下のコマンドを実行
config/app.php内で以下のコメントアウトを外す。
App\Providers\BroadcastServiceProvider::class,
App/Providers/EventServiceProvider.php
<?php
namespace App\Providers;

use Illuminate\Auth\Events\Registered;
use Illuminate\Auth\Listeners\SendEmailVerificationNotification;
use Illuminate\Foundation\Support\Providers\EventServiceProvider as ServiceProvider;
use Illuminate\Support\Facades\Event;

class EventServiceProvider extends ServiceProvider
{
/**
* The event listener mappings for the application.
*
* @var array
*/
protected $listen = [
// Registered::class => [
// SendEmailVerificationNotification::class,
// ],
  'App\Events\ChatEvent' => [
   'App\Listener\ChatListener',
  ],
];

 /**
* Register any events for your application.
*
* @return void
*/
public function boot(){
//
}
}
以下のコマンドを実行
EventsとListenerフォルダがapp内に作成される。

Eventsフォルダに作成されたChatEvent.phpを開いて、ShoudBroadcastを実装。
↓
class ChatEvent implements ShouldBroadcast
app/Events/ChatEvent.php
※以下を追加。
use App\Models\User;
use Illuminate\Queue\SerializesModels;
use App\Models\User;
class ChatEvent implements ShouldBroadcast
{
  use Dispatchable, InteractsWithSockets, SerializesModels;
  public $message;
  public $user;

  public function __construct($message, User $user)
  {
   return $this->message = $message;
   return $this->user = $user;
  }

  public function broadcastOn()
  {
   return new PrivateChannel('chat');
  }
}
コントローラの作成
app/Http/Controllers/ChatController.php
chatとsend関数を作る。
<?php
namespace App\Http\Controllers;
use App\Events\ChatEvent;
use App\Models\User;
use Illuminate\Http\Request;
use Illuminate\Support\Facades\Auth;

class ChatController extends Controller
{
 public function chat(){
  return view('chat');
 }

 public function send(Request $request){
  $user=User::find(Auth::id());
  event(new ChatEvent($request->message,$user));
 }
}
ログイン機能

ログインページはあるものの、テーブルがないため、DBを作る。
phpmyadminを使用想定。(使い方はここでは省略)
chatというDBを作る。
.envを確認。デフォルトのポート番号が3306なら以下のように設定。
DB_CONNECTION=mysql
DB_HOST=127.0.0.1
DB_PORT=3306
DB_DATABASE=chat
DB_USERNAME=root
DB_PASSWORD=
以下のコマンドを実行するとdatabase\migrationsの中にあるファイルの分テーブルが作成される。
phpmyadminのchatにusersテーブルが作成されていることを確認。

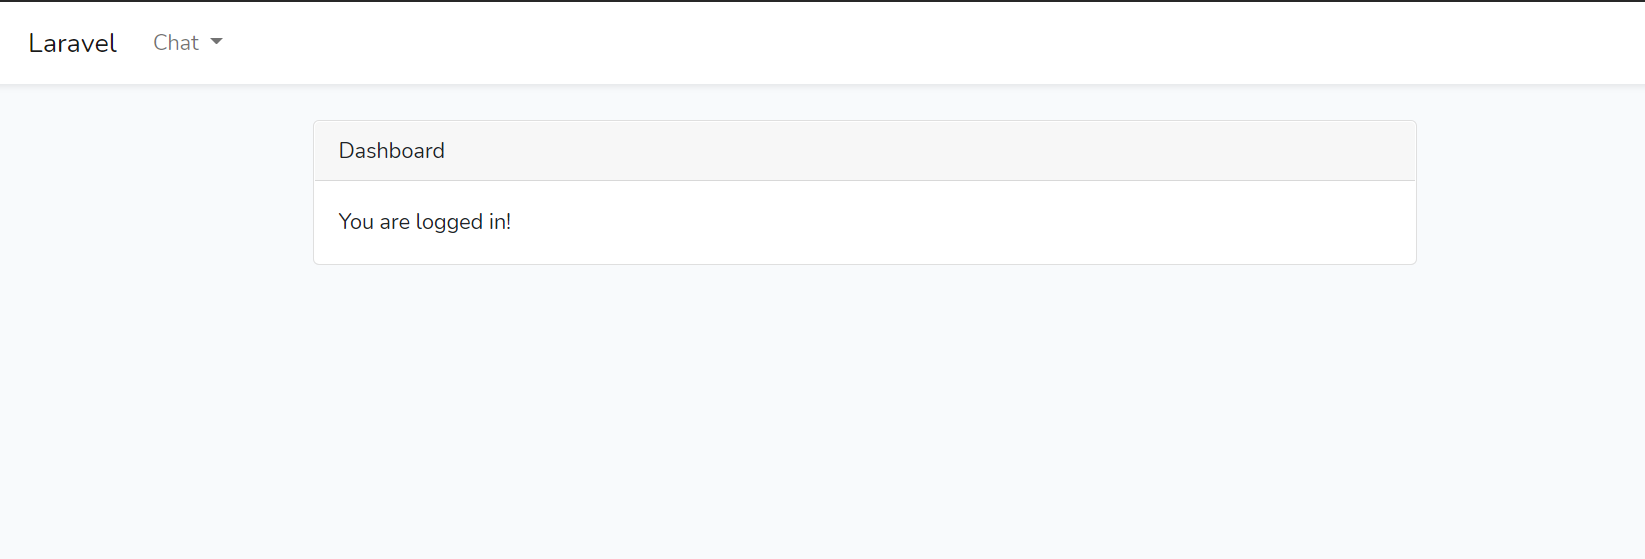
http://127.0.0.1:8000/register
ユーザーを登録する。

以下のように表示されればOK
routes/web.php
以下のように記載することで、/chatにアクセスしたときに認証するようになります。
Route::group(['prefix'=> '/', 'middleware'=>'auth'],function(){
 Route::get('chat', [App\Http\Controllers\ChatController::class,'chat']);
});
※講座ではChatController内で認証チェックをするようにしています。
Pusherを使ったリアルタイム通知機能の実装
Pusherという無料サービスを利用して、eventをbroadcastするドライバー使えるようにしていきます。
googleアカウントで無料登録する。
Channels の「Get Started」をクリック
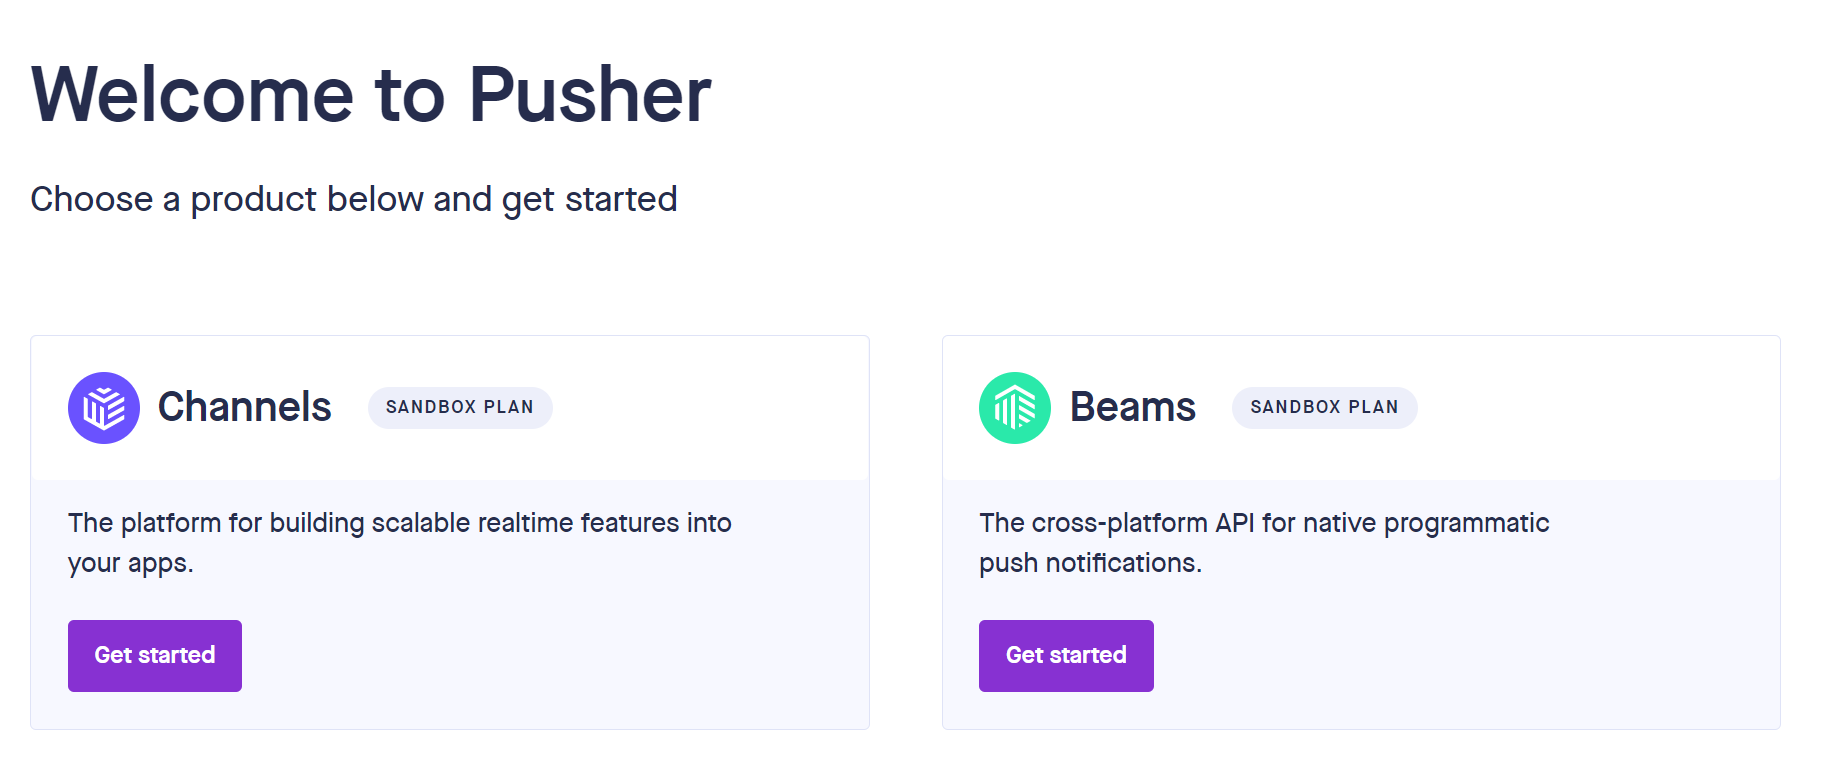
以下のようにapp名を入力、frontにvue.js、backendにlaravelを選択。

「Create app」後、以下のような画面が表示される。

左側にある「App Keys」をクリック。

app_id,key,secretの値を.envファイルの以下にそれぞれ設定。
PUSHER_APP_ID=
PUSHER_APP_KEY=
PUSHER_APP_SECRET=
clusterの値は
config/broadcasting.php
内のclusterに設定する。
'cluster' => 'ap3',
laravel echoのインストール
resources/js/bootstrap.js
コメントアウトを外す。
keyとclusterの値を.envと同じようにpusherのApp keysで確認した値に変更する。
import Echo from 'laravel-echo';

window.Pusher = require('pusher-js');
window.Echo = new Echo({
  broadcaster: 'pusher',
  key: process.env.MIX_PUSHER_APP_KEY,
  cluster: process.env.MIX_PUSHER_APP_CLUSTER,
  forceTLS: true
});
※講座ではforceTLSがencryptedとなっていますが8.xの公式ドキュメントではforceTLSとなっているので、そのままでOKかと思います。
ChatControllerのsend関数を一旦以下のような関数にする。
    public function send(){
        $message = 'Hello';
        $user=User::find(Auth::id());
        event(new ChatEvent($message,$user));
    }
web.phpのルーティングに以下を追加。
Route::get('send', [App\Http\Controllers\ChatController::class,'send']);
npm run dev またはnpm run watchを実行
↓
php artisan serve
http://127.0.0.1:8000/send
(画面はないので、白画面が表示)
PusherにてDebug consoleをクリック

ChatController内に記載した固定messageの”Hello”が表示されていることを確認する。
ChatEvent.phpのコンスタント内のreturnを消す。
    public function __construct($message, User $user)
    {
        $this->message = $message;
        $this->user = $user;
    }
pusher側のconsoleにてuser情報が全て表示される。

userのnameだけをpusherのconsoleに表示したい場合、
app/Events/ChatEvent.phpのコンスタント内を以下にする。
    public function __construct($message, User $user)
    {
        $this->message = $message;
        $this->user = $user->name;
    }
/sendでpusherに送られたメッセージをコンソールに表示
pusher側で新しいchannelを作っておく。
channel:chat
Event:ChatEvent

routes/channels.php
に以下を追加する。
Broadcast::channel('chat', function(){
    return true;
});
resources/js/app.js
に以下をmounted()を追加
    mounted(){
        window.Echo.private('chat')
        .listen('ChatEvent', (e) => {
            console.log(e);
        });
    }
※講座ではwindowがついてないですが、ないとおそらくエラーになります。
http://127.0.0.1:8000/send
(画面はないので、白画面が表示)
http://127.0.0.1:8000/chat
側に固定メッセージがコンソール上に表示される

axiosを使ってメッセージを送信する
resources/js/bootstrap.jsにaxiosが記載されていれば、インストールコマンドを実行する必要はないです。

※ない場合
npm install axios
resources/js/app.js
axios.postを追加。
 methods:{
  send(){
   if(this.message.length !=0){
   //console.log(this.message);
    this.chat.message.push(this.message);
    axios.post('/send', {
     message: this.message
    })
    .then(response => {
      console.log(response);
      this.message = '';
    })
    .catch(error => {
      console.log(error);
    });
   }
  }
 },
 mounted(){
  window.Echo.private('chat')
   .listen('ChatEvent', (e) => {
     this.chat.message.push(e.message);
     console.log(e);
   });
 }
app/Http/Controllers/ChatController.php
send関数を以下のようにする。
 public function send(Request $request){
  $user=User::find(Auth::id());
  event(new ChatEvent($request->message,$user));
 }
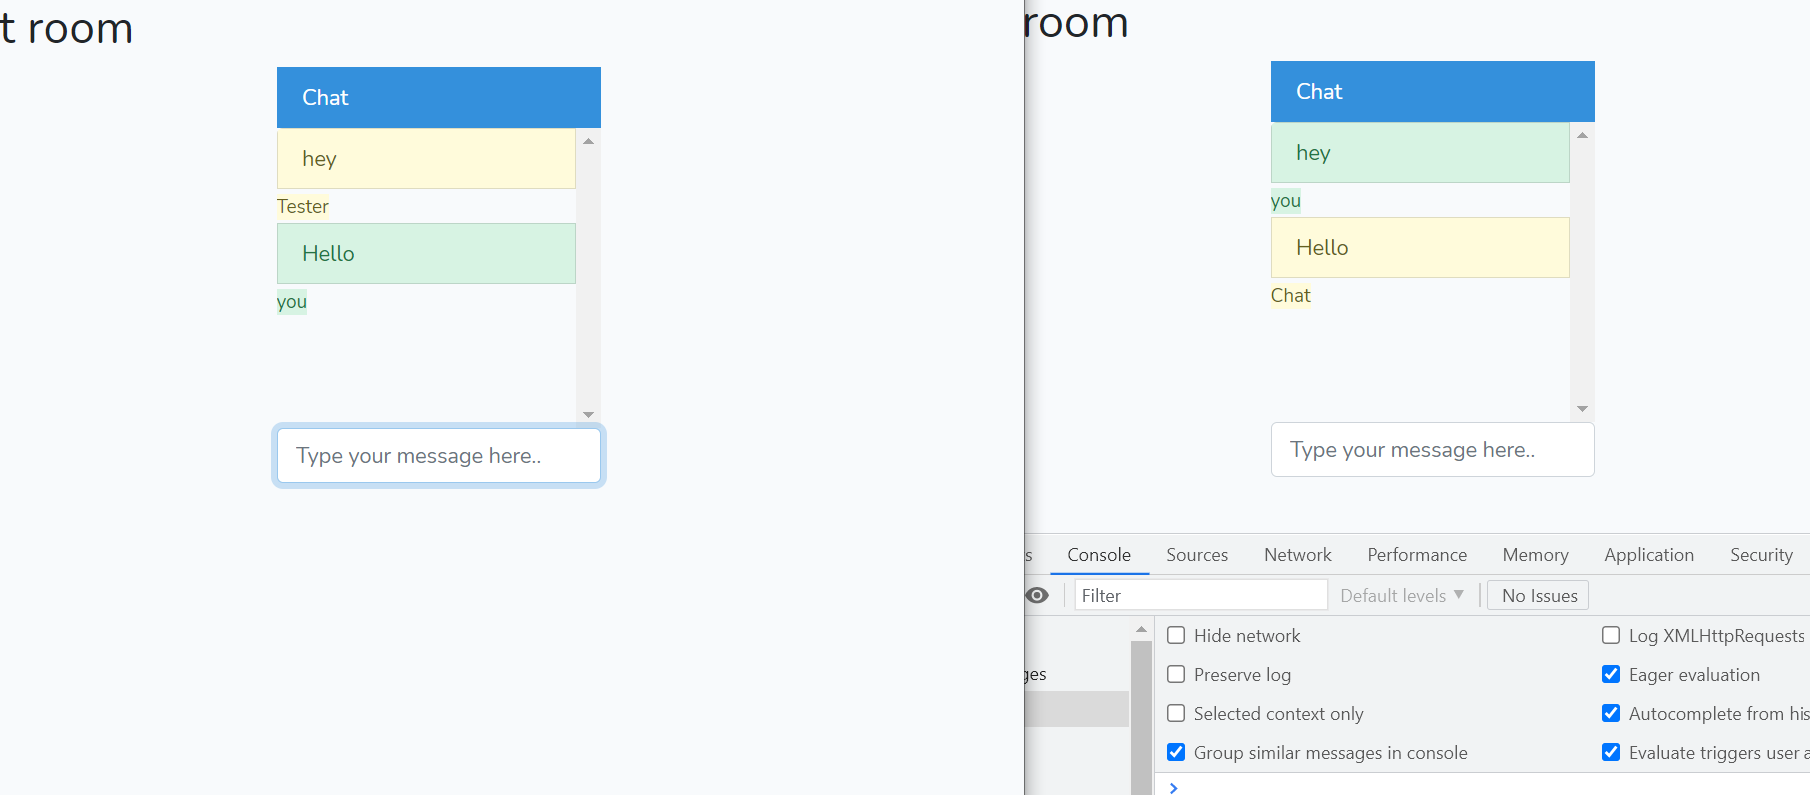
この状態で異なるブラウザを2つ並べて、片方にメッセージを入力すると、入力した方(右側)は、2つメッセージが表示され、もう片方(左側)は、1つメッセージが表示されます。
右側は、自分が入力したメッセージとbroadcastされたものが表示されてます。
左側は、broadcastされたもののみが表示されてます。

自分が入力したものが重複して表示されないようにします。
app/Events/ChatEvent.php
 public function __construct($message, User $user)
{
 $this->message = $message;
 $this->user = $user->name;
 $this->dontBroadcastToCurrentUser();
}
$this->dontBroadcastToCurrentUser();
この関数を使うことで、入力したときにメッセージが2回表示されなくなります。
resources/js/app.js
自分が入力したメッセージと相手方でユーザー名が識別されるようにしていきます。
const app = new Vue({
 el: '#app',
 data:{
  message:'',
  chat:{
   message:[],
   user:[],
   color:[]
  }
 },
 methods:{
  send(){
   if(this.message.length !=0){
   //console.log(this.message);
    this.chat.message.push(this.message);
    this.chat.color.push('success');
    this.chat.user.push('you');
    axios.post('/send', {
     message: this.message
    })
    .then(response => {
      console.log(response);
      this.message = '';
    })
    .catch(error => {
      console.log(error);
    });
   }
  }
 },
 mounted(){
  window.Echo.private('chat')
   .listen('ChatEvent', (e) => {
    this.chat.message.push(e.message);
    this.chat.user.push(e.user);
    this.chat.color.push('warning');
    console.log(e);
   });
 }
});
dataにuserとcolorを追加、send()内について
this.chat.color.push('success');  //success(緑色)で表示
this.chat.user.push('you'); //youは自分が送る場合、常にyouを表示
mounted()内にも同様に追加
 this.chat.user.push(e.user); //メッセージを受信した方にユーザーの名前を表示
 this.chat.color.push('warning');  //黄色で表示
resources/components/Message.vue
propsに’user’を追加
<template>
<div>
<li class="list-group-item" :class="className"><slot></slot></li>
<small class="float-right" :class="className">{{user}}</small>
</div>
</template>

<script>
 export default {
  props:{
   'color':{},
   'user':{}
  },
youを{{user}}に変更
<small class="float-right" :class="className">{{user}}</small>
resources/views/chat.blade.php
<body>
 <div class="container">
  <div class="row" id="app">
   <h1>Chat room</h1>
   <div class="offset-4 col-md-4">
    <li class="list-group-item active">Chat</li>
    <ul class="list-group" v-chat-scroll>
     <message v-for="value,index in chat.message" :key=value.index :color=chat.color[index] :user=chat.user[index]>
      @{{value}}
     </message>
    </ul>
    <input type="text" class="form-control" placeholder="Type your message here.." v-model='message' @keyup.enter='send'>
   </div>
  </div>
 </div>
 <script src="{{ asset('js/app.js') }}"></script>
</body>
<message>タグ内にcolorとuserを追加
ブラウザを2つようにしてそれぞれ違うユーザーでログインした状態で、それぞれメッセージを送信すると、自分のメッセージは緑(success)、名前はyou、受信した側のメッセージは黄色(warning)、名前はユーザー名(送信したログインユーザー)になったことを確認。
※名前が左に表示されていますが、bootstrapがうまくいってなかったので、上の方に記載したコマンドを後で実行しなおしています。(本来なら右側に表示されます)
