


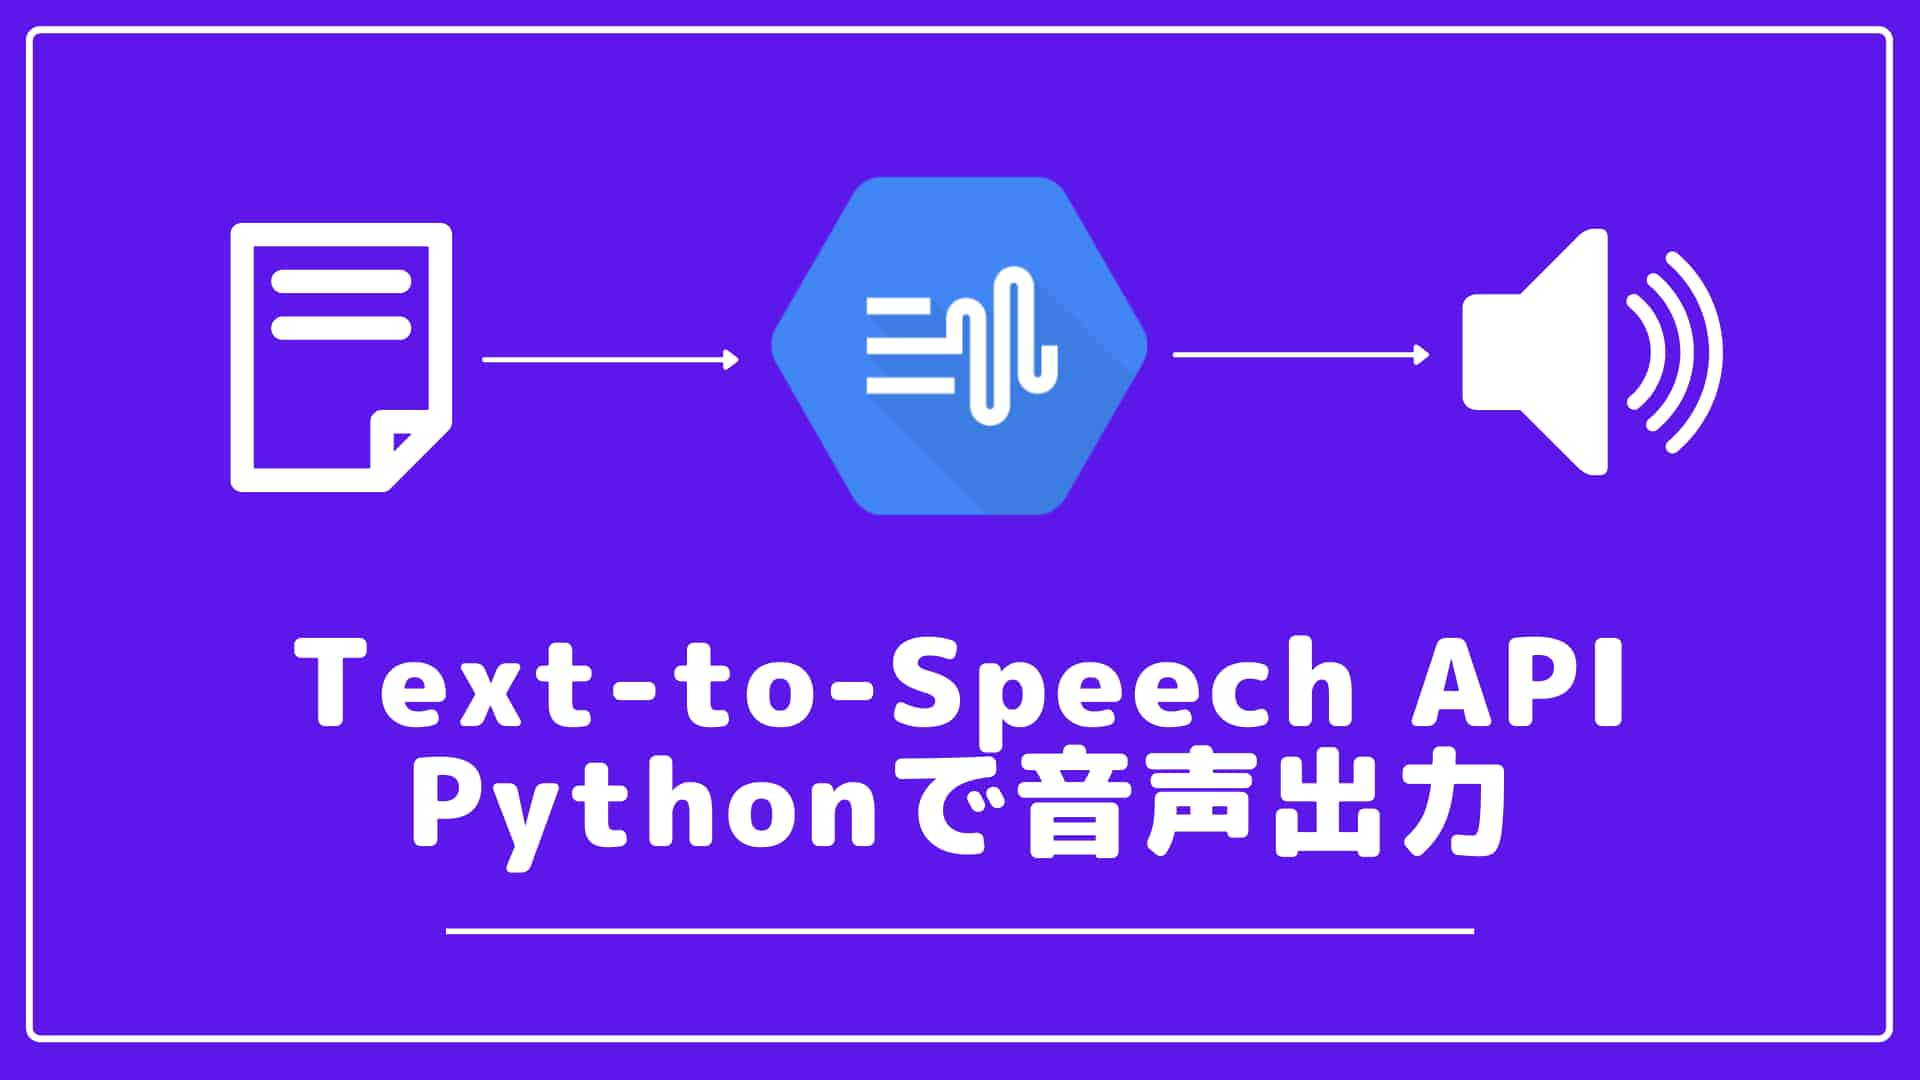
GCP(Google Cloud Platform)のText-to-Speech APIを利用することでテキストを音声出力することができます。
本記事ではPython(JupyterLab)で音声出力する方法を紹介します。
JupyterLabのインストールと使い方については以下の記事で解説しています。
1.Cloud text-to-Speech APIサービスの有効化とAPIキーの取得
Cloud text-to-Speech APIの有効化とAPIの取得について紹介します。
利用するにはまず、GCP(Google Cloud Platform)へアカウント登録する必要があります。
アカウント登録時にクレジットカードかPayPalの登録をする必要がありますが、90日間有効の$300相当が無料で使えます。
この無料枠を利用してテキストから音声出力をPythonで行います。
無料期間を終了しても、手動でアップデートしない限りは請求されることはありません。
GCPへのアカウント登録が完了したら、今回利用するCloud Text-to-Speechの有効化をしていきます。
1.1Cloud Text-to-Speech APIの有効化
APIとサービスページに移動。
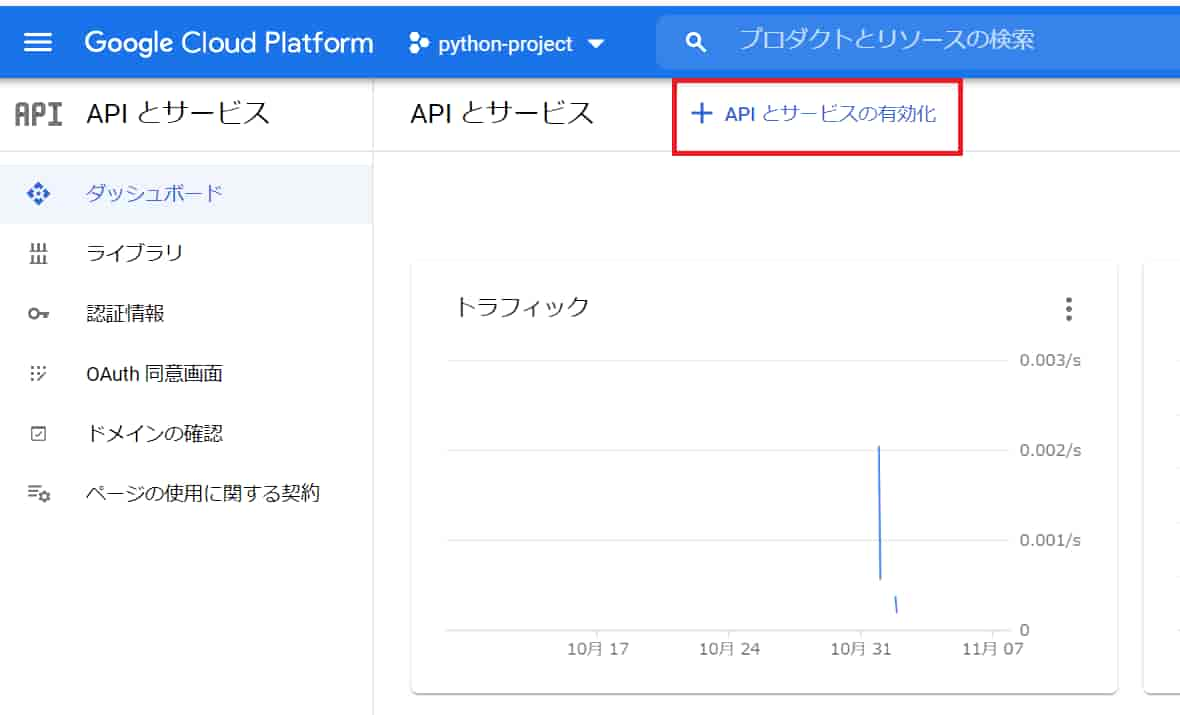
「APIとサービスの有効化」をクリック。
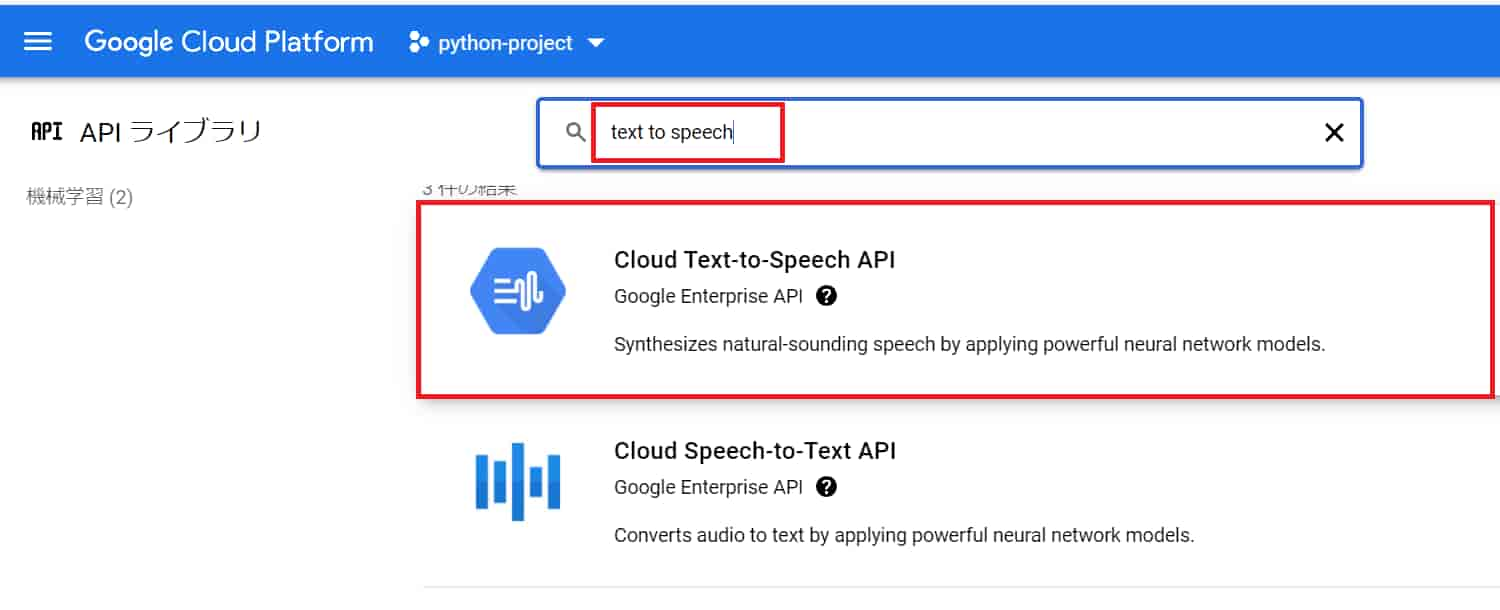
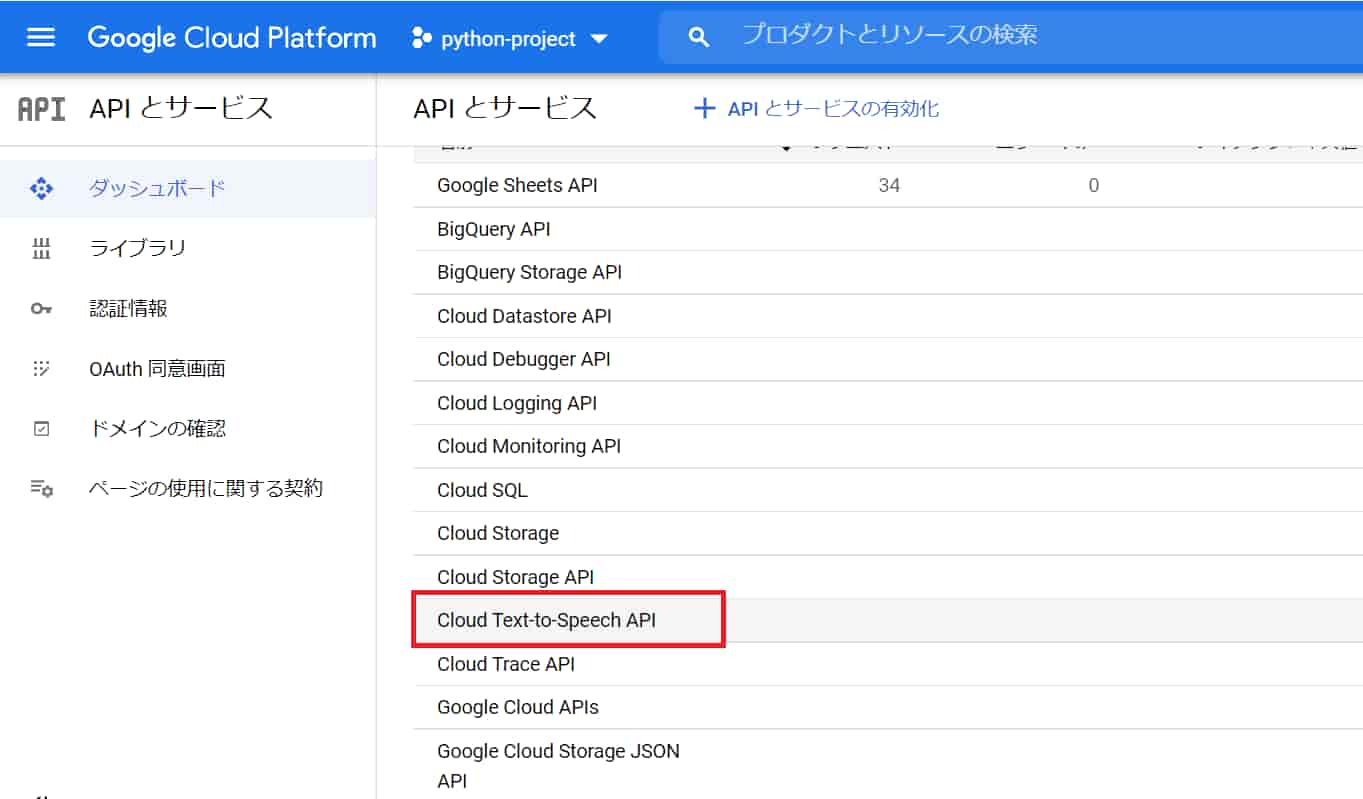
「text to speech」で検索するとCloud Text-to-Speech APIが出てくるので、選択。
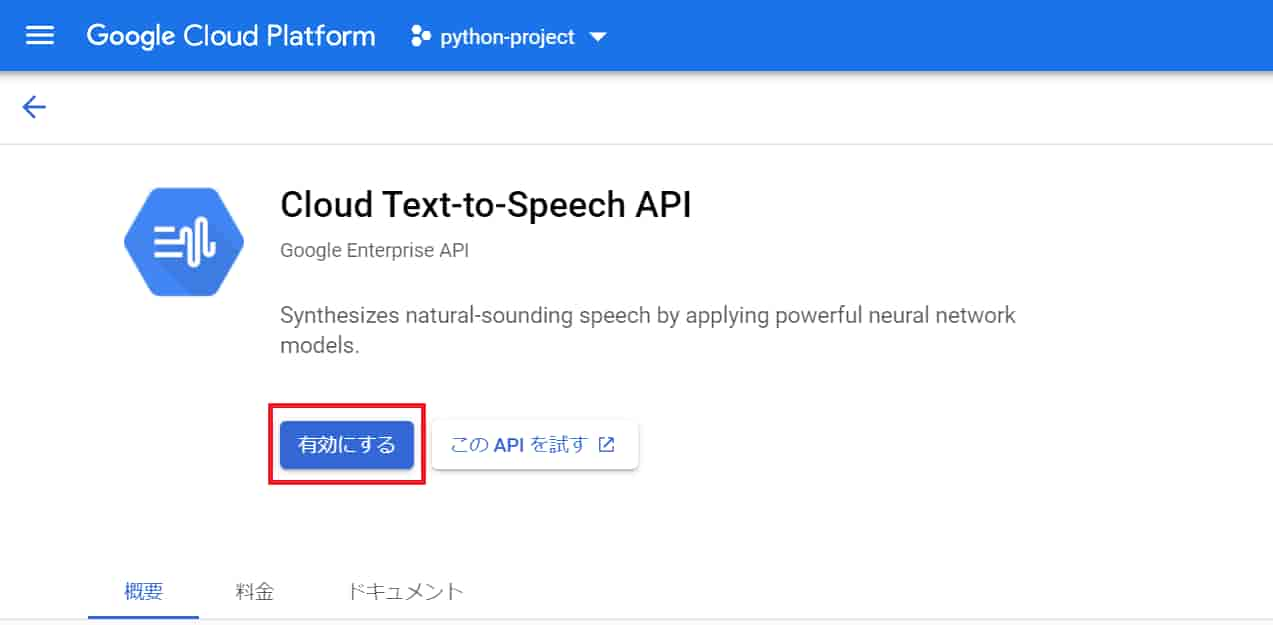
text-to-speech 有効化
「有効にする」をクリック。
text-to-speech 確認
APIとサービスのダッシュボード下の方に「Cloud text-to-Speech API」が追加されていることが確認できます。
1.2Cloud text-to-Speech API キーの取得
続いて、キーを取得していきます。
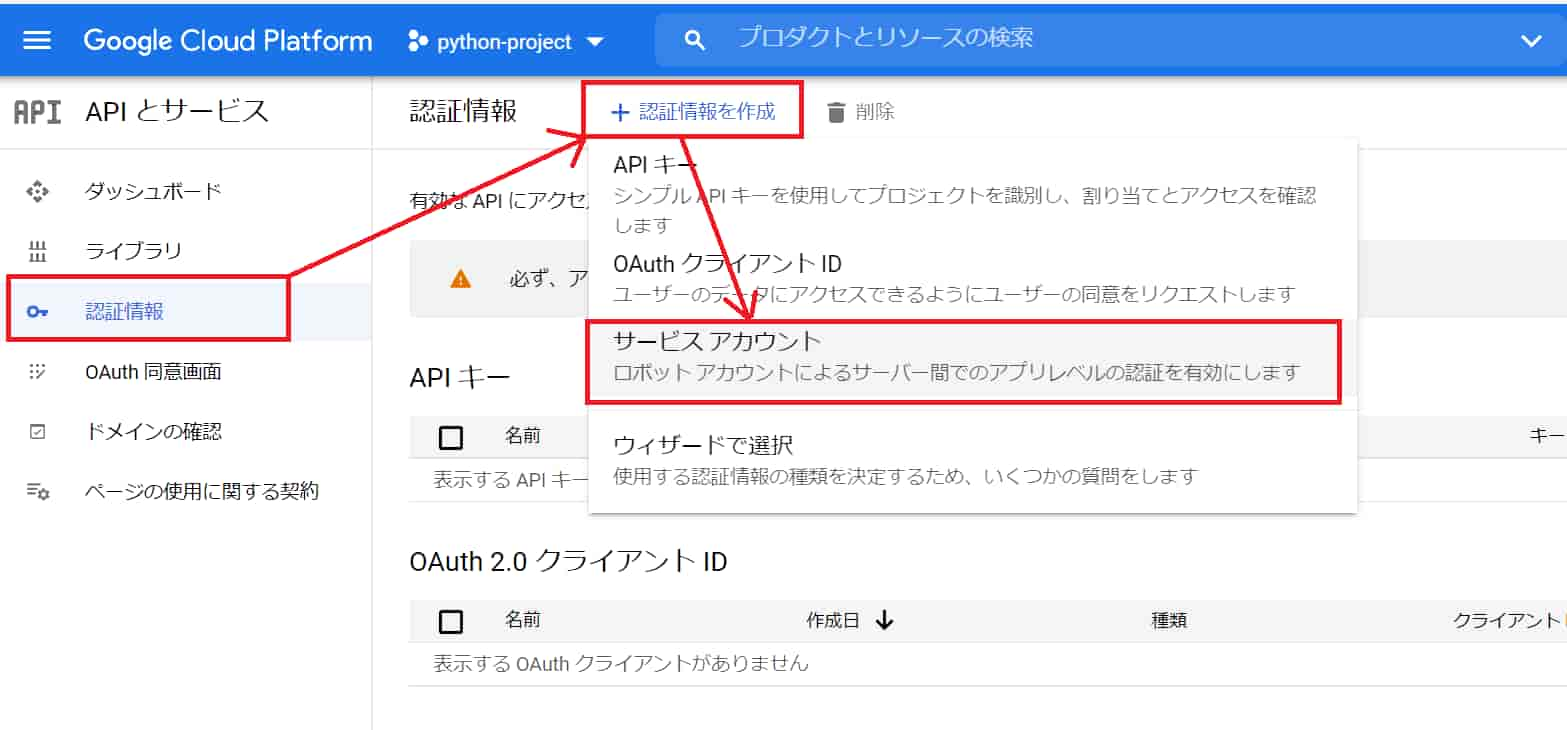
「認証情報」ページにて、「認証情報を作成」から「サービスアカウント」を選択。
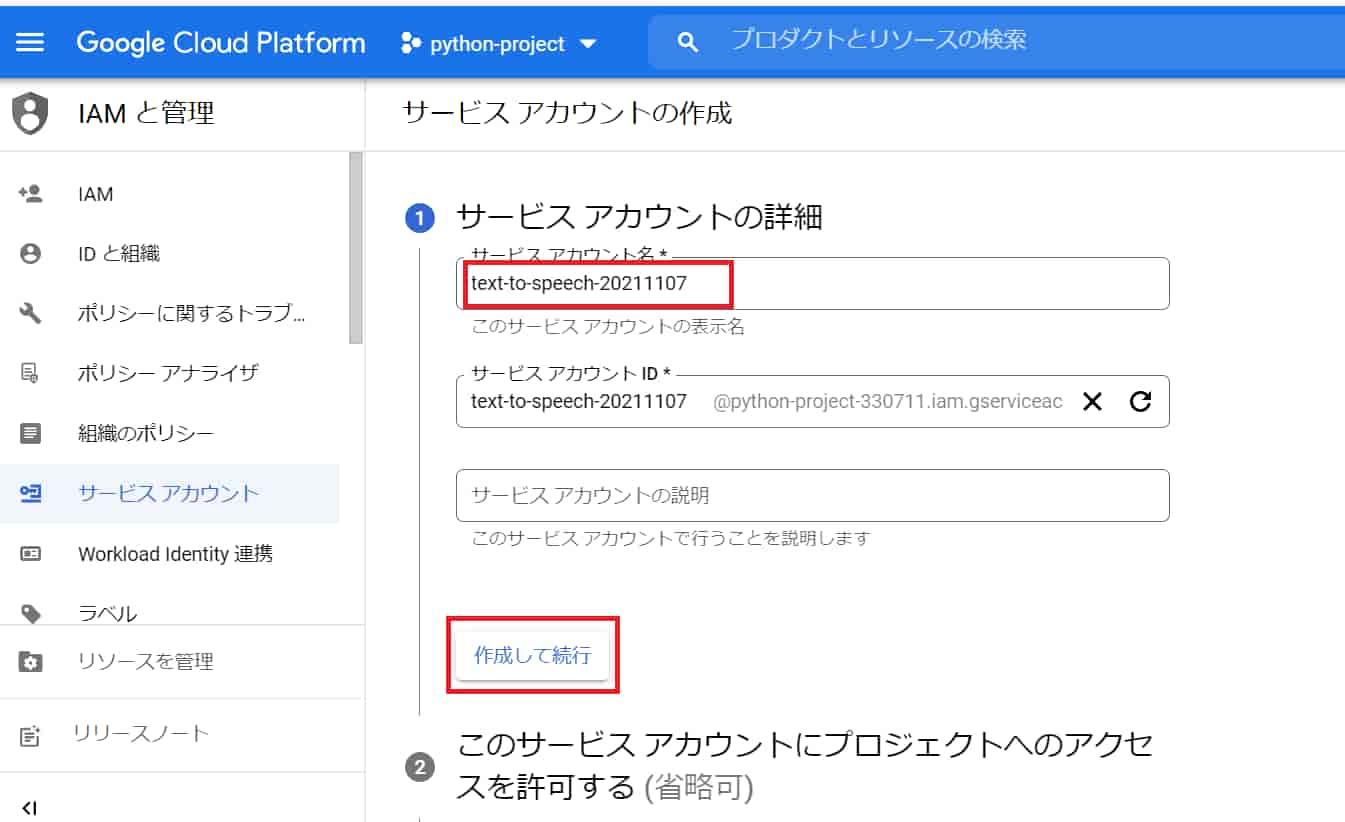
「サービスアカウント名」を適当に入力して、「作成して続行」をクリック。
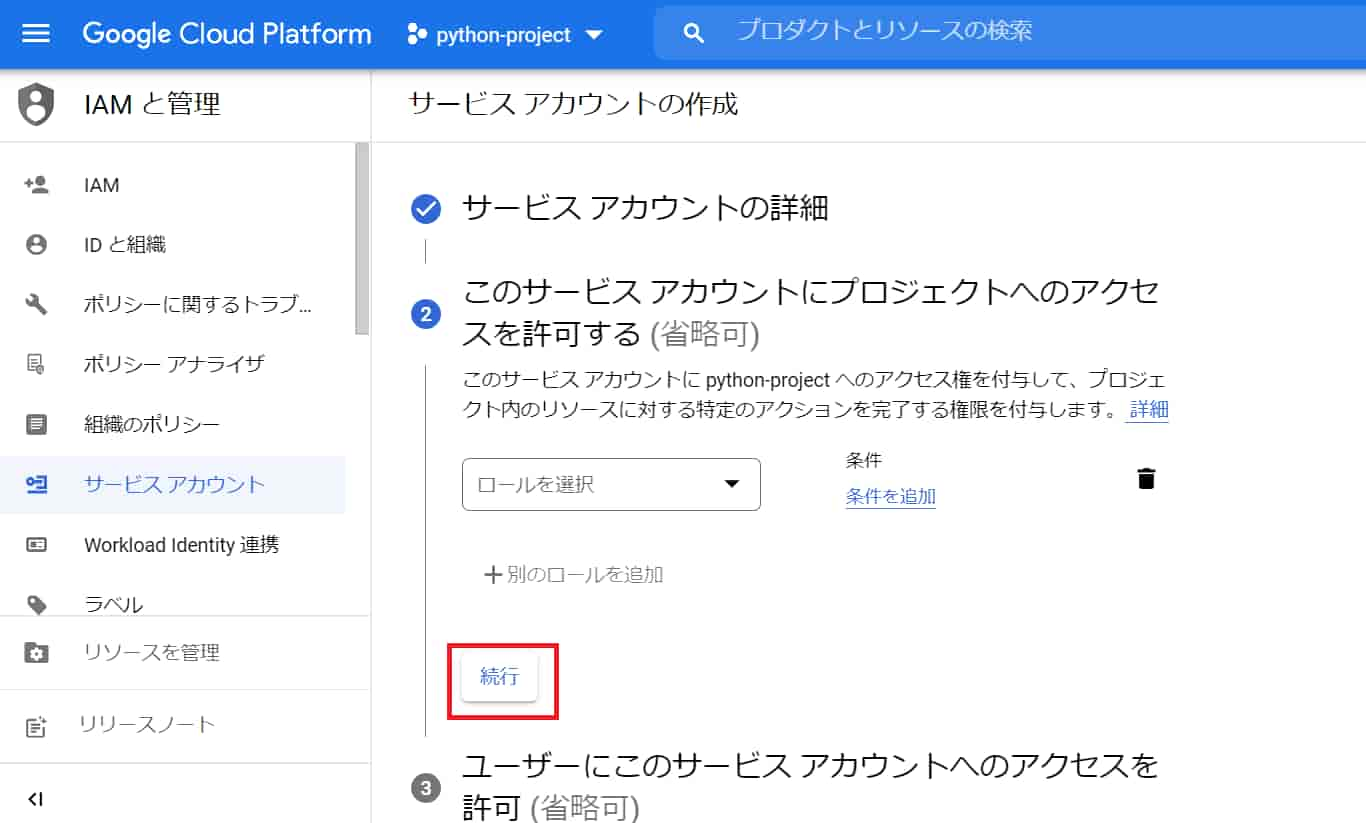
「ロールを選択」は特に何もせず、「続行」。
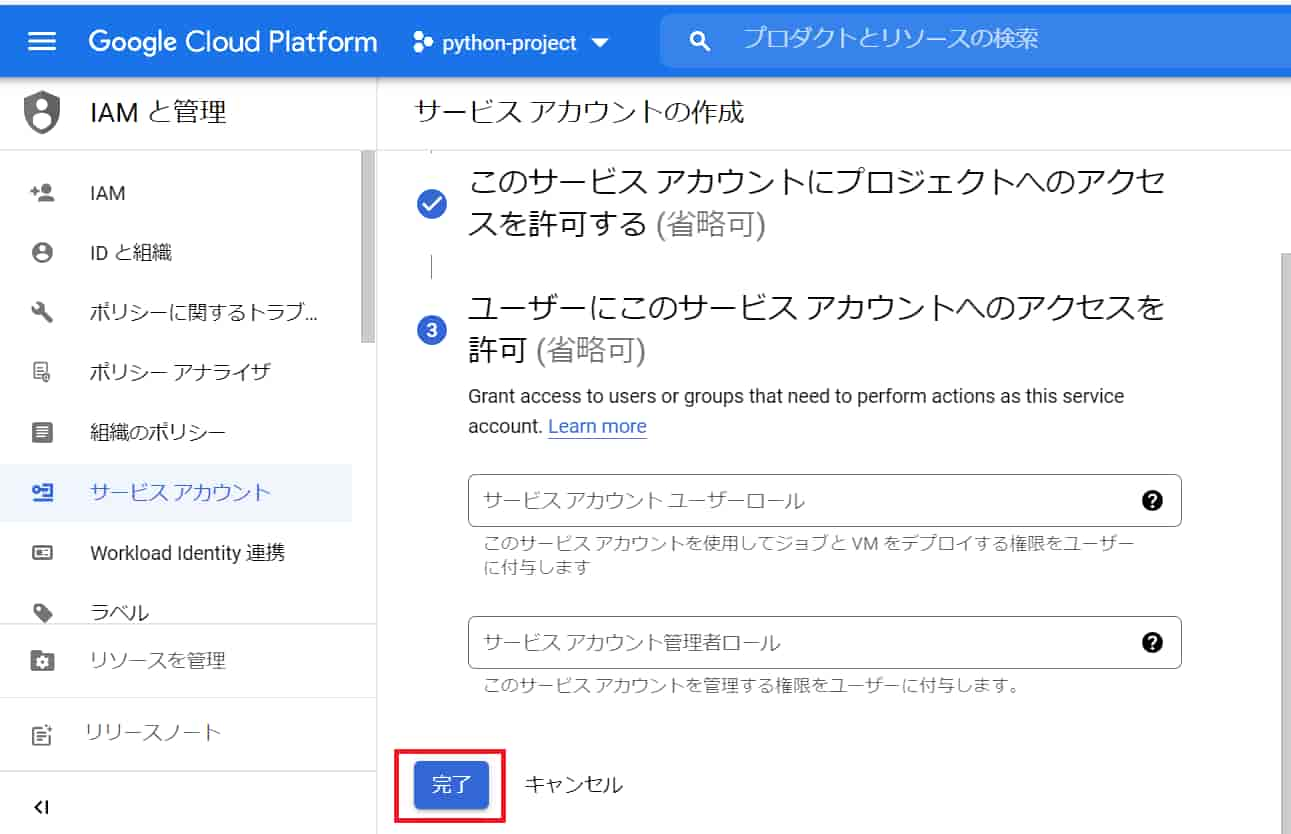
「完了」をクリック。
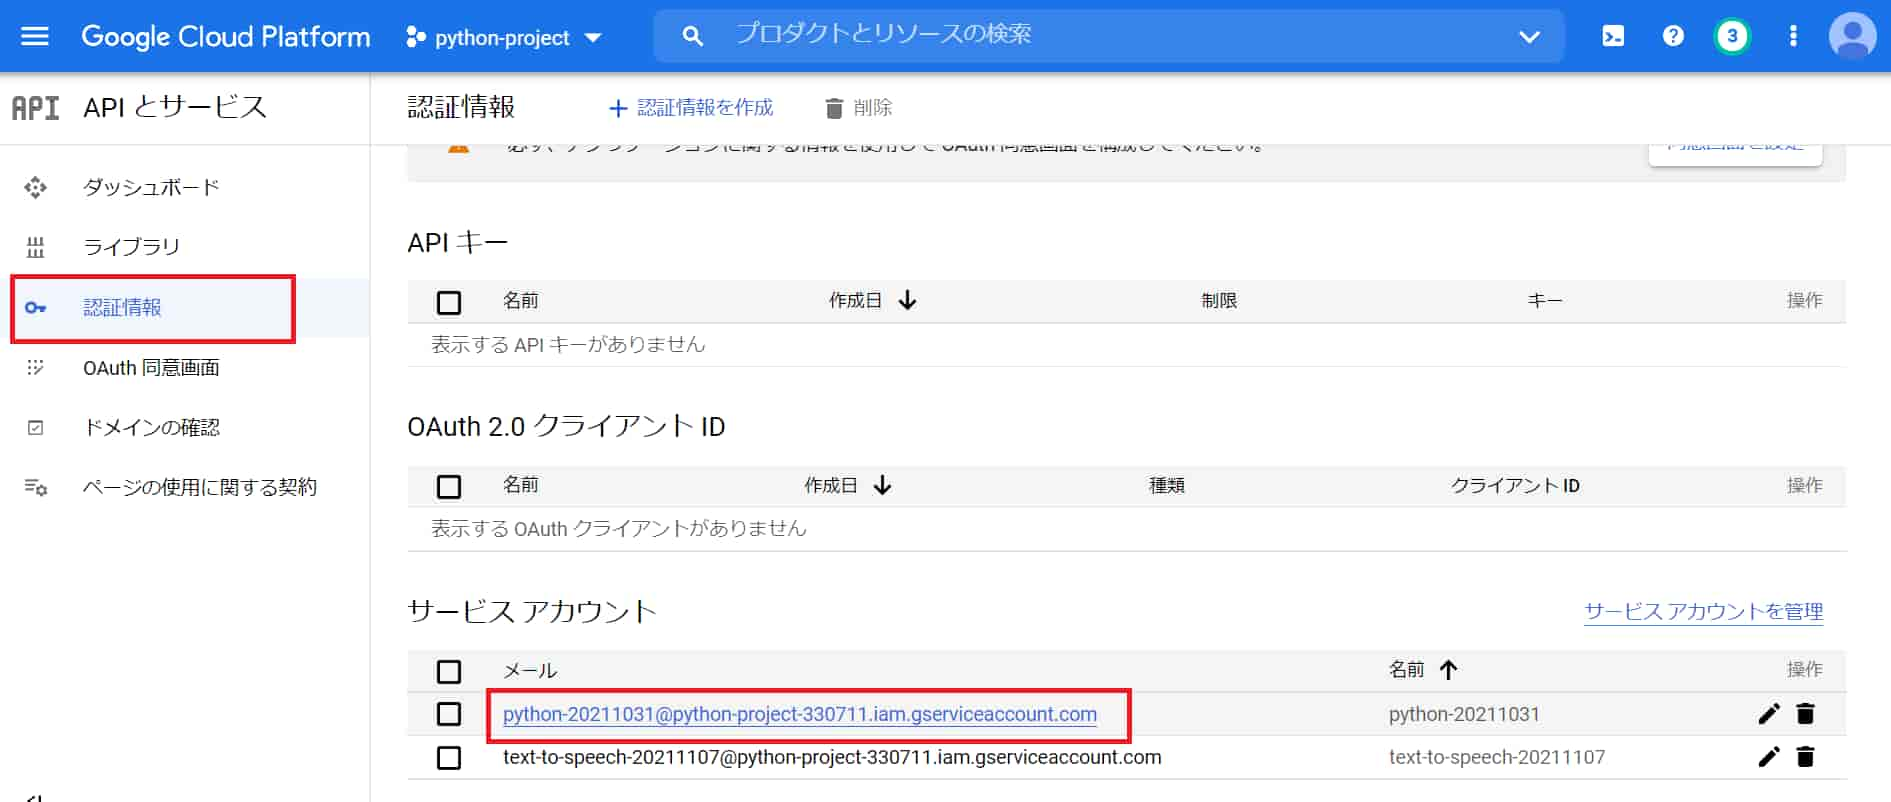
「認証情報」にてサービスアカウントにメールが追加されているを確認して、選択。
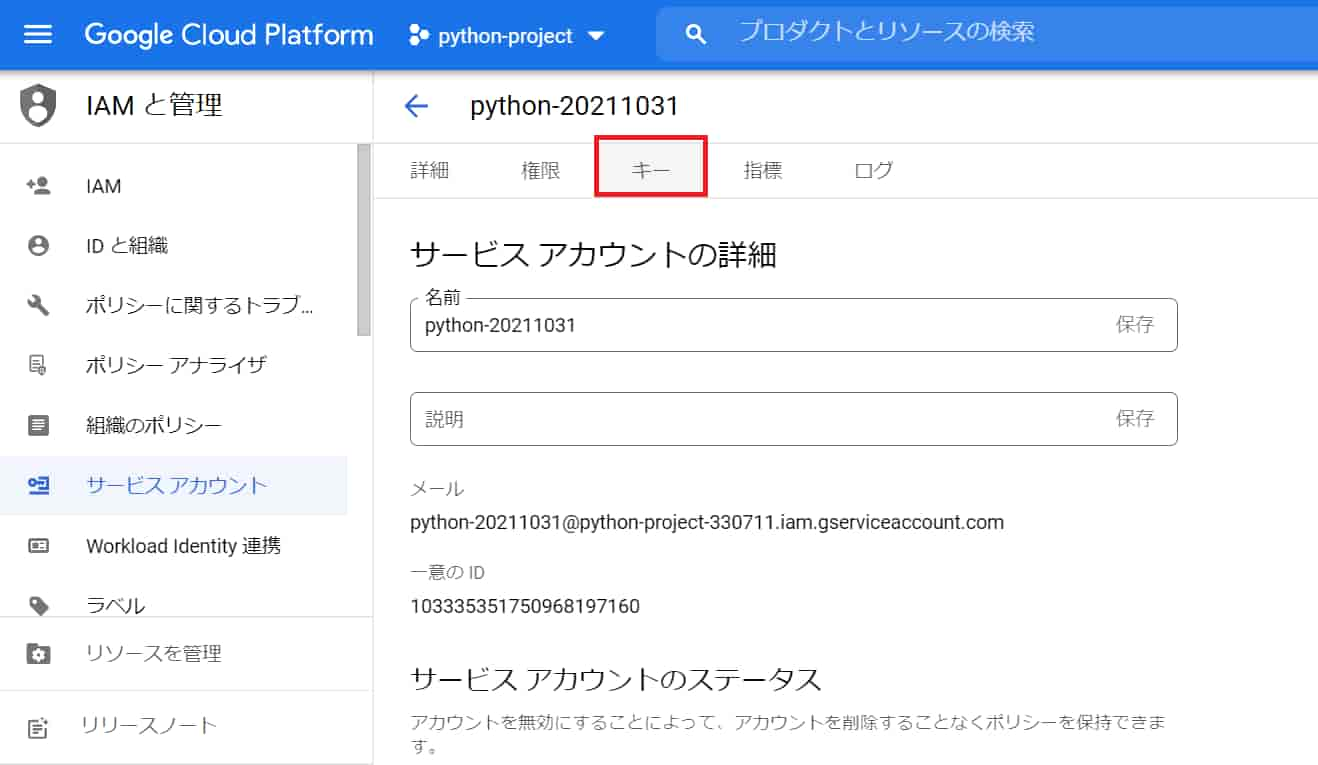
「キー」をクリック。
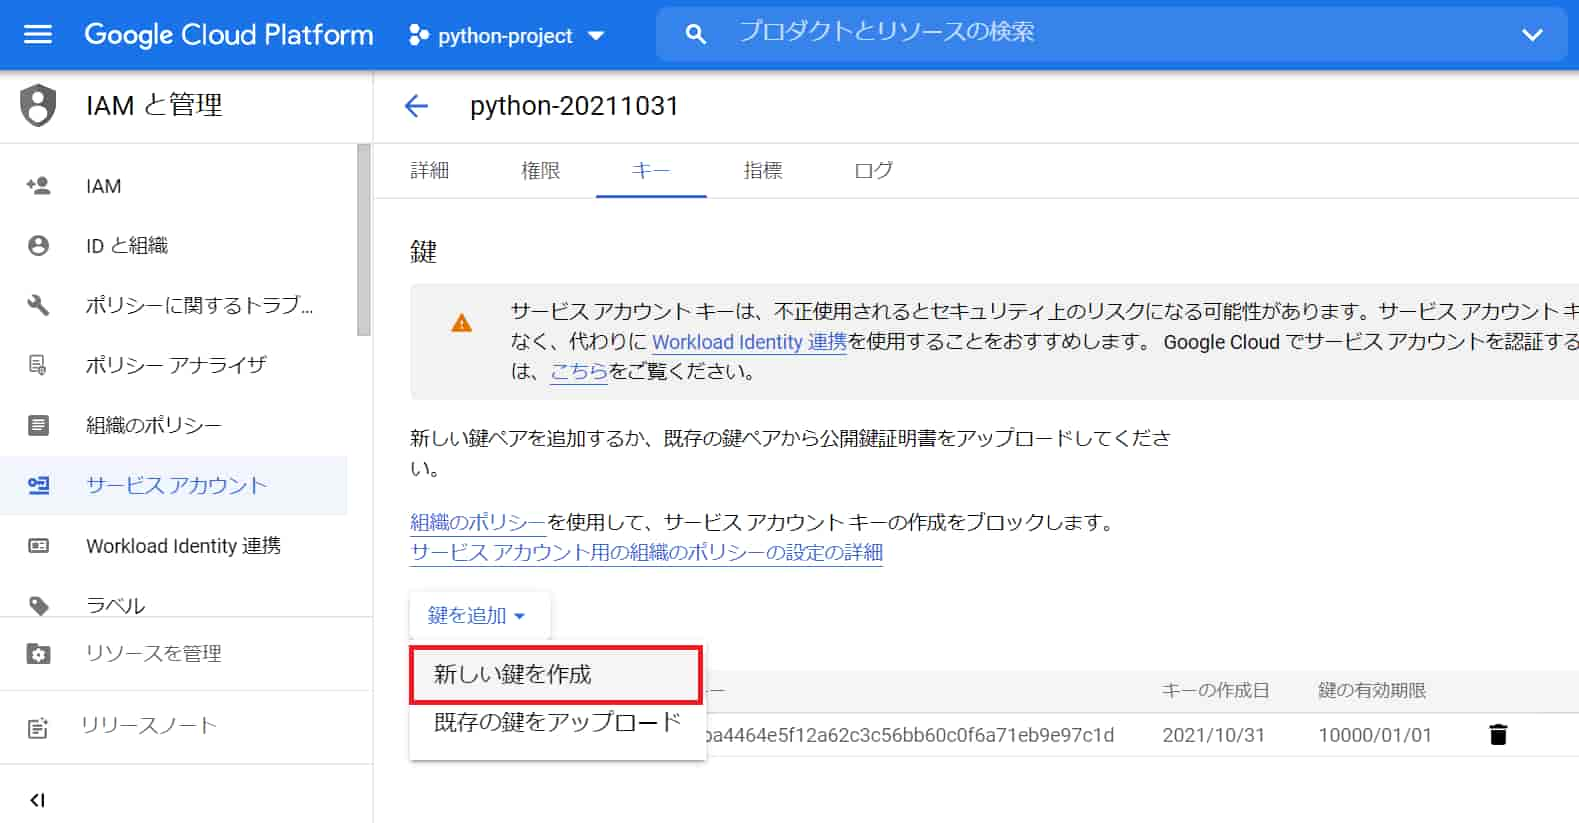
「鍵を追加」から「新しい鍵を作成」をクリック。
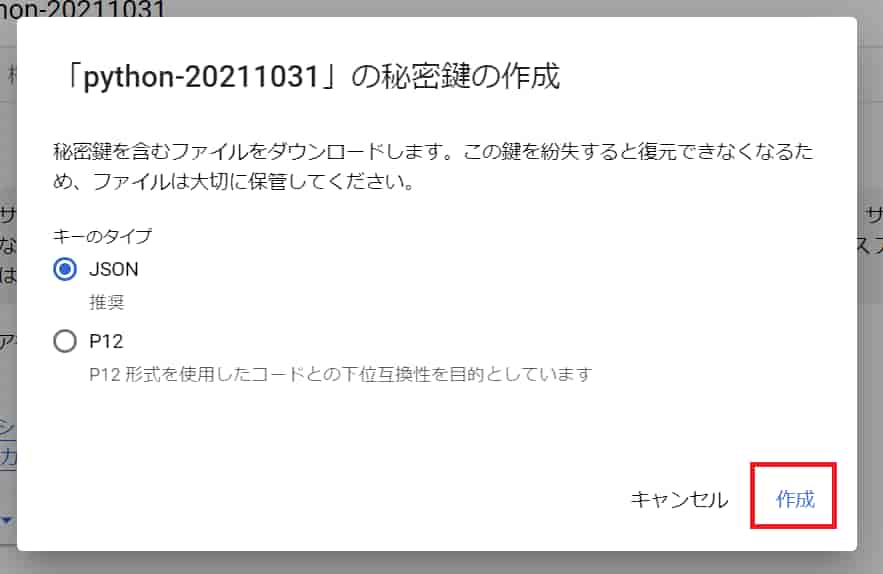
JSONが選択された状態で「作成」をクリック。
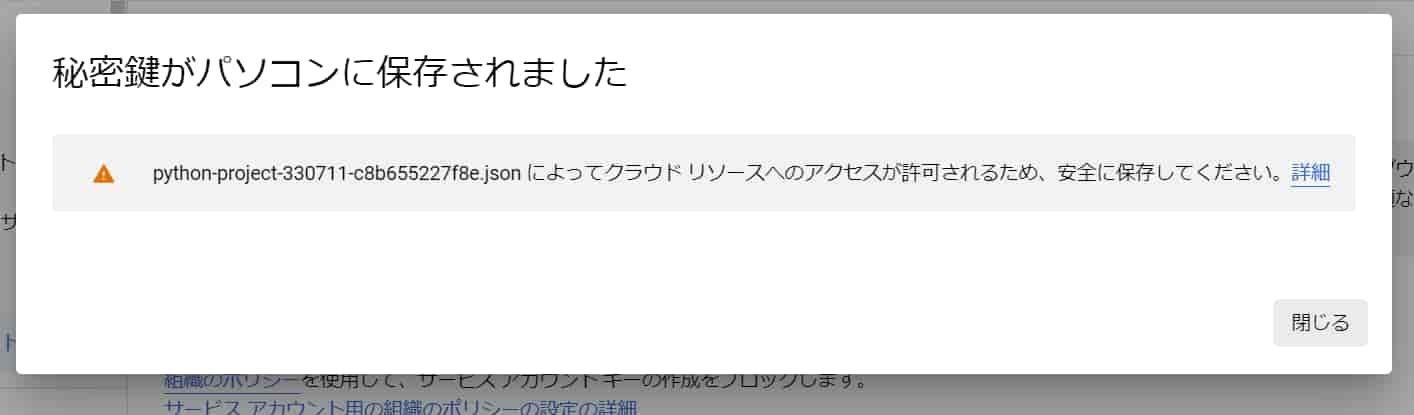
JSONファイルがPCにダウンロードされます。
2.サンプルコードの実行
import os
os.environ['GOOGLE_APPLICATION_CREDENTIALS'] = 'secret-key.json'
pip install --upgrade google-cloud-texttospeech
ダウンロードしたjsonファイルを上記のように設定します。
jsonファイルはjupyterlabで実行しているファイル(ipynb)と同じ階層に置きます。
※secret-key.jsonにリネームしてます。(リネームしなくてもOKです。)
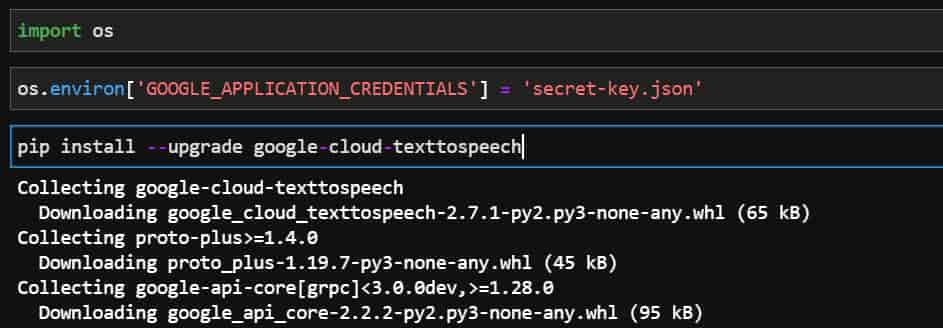
pip install実行後、successfully installed と出ればOK。
サンプルコードはここから取得できます。
https://cloud.google.com/text-to-speech/docs/libraries?hl=JA#using_the_client_library
from google.cloud import texttospeech

client = texttospeech.TextToSpeechClient()

synthesis_input = texttospeech.SynthesisInput(text="Hello, World!")

voice = texttospeech.VoiceSelectionParams(
    language_code="en-US",
    ssml_gender=texttospeech.SsmlVoiceGender.NEUTRAL
)

audio_config = texttospeech.AudioConfig(
    audio_encoding=texttospeech.AudioEncoding.MP3
)

response = client.synthesize_speech(
    input=synthesis_input, voice=voice, audio_config=audio_config
)

with open("output.mp3", "wb") as out:
    out.write(response.audio_content)
    print('Audio content written to file "output.mp3"')
テキストを「Hello, World!」、言語を「en-US」、ボイスを「neutral」としてtexttospeechに設定。
アウトプットをmp3ファイル形式、ファイル名を「output.mp3」として指定。
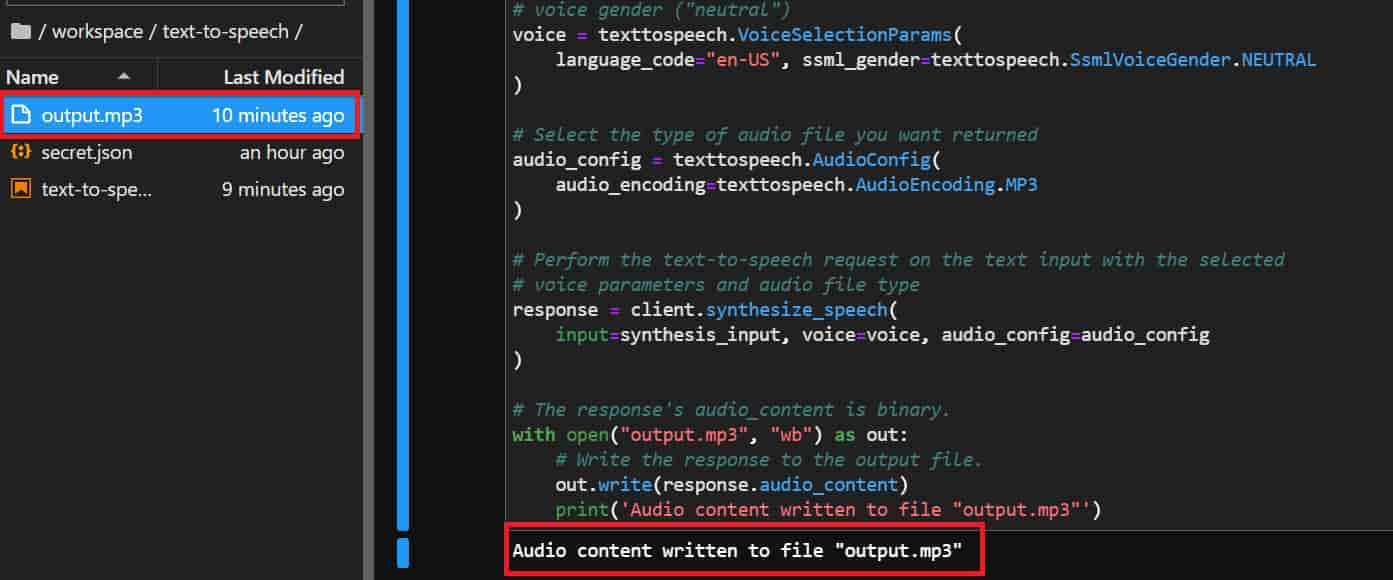
output.mp3が生成されて、「Hello world」とneutralボイスでちゃんとしゃべってくれてます!
自動生成された音声(テキスト)
2.1ボイス変更
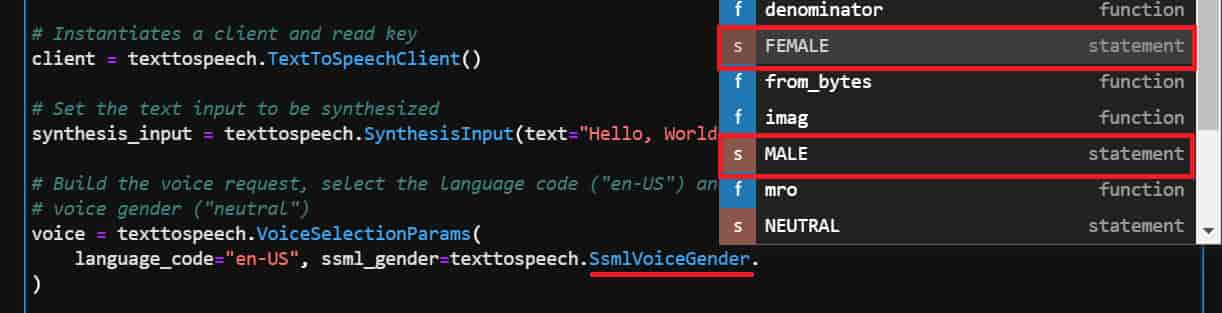
SsmlVoiceGenderでtabキーを押すと候補が出てくるので、FEMALEやMALEに変更できます。
また言語設定を日本語にする場合はlanguage_code を以下のように変更します。
language_code = "ja-JP"
2.2オーディオファイルを生成せずにJupyterLabで音声を確認する。
サンプルコードのresponseより下のコードをコメントアウトして、shift + enterで実行します。
下のコードを追加して、同様に実行します。
from IPython.display import Audio
Audio(response.audio_content)
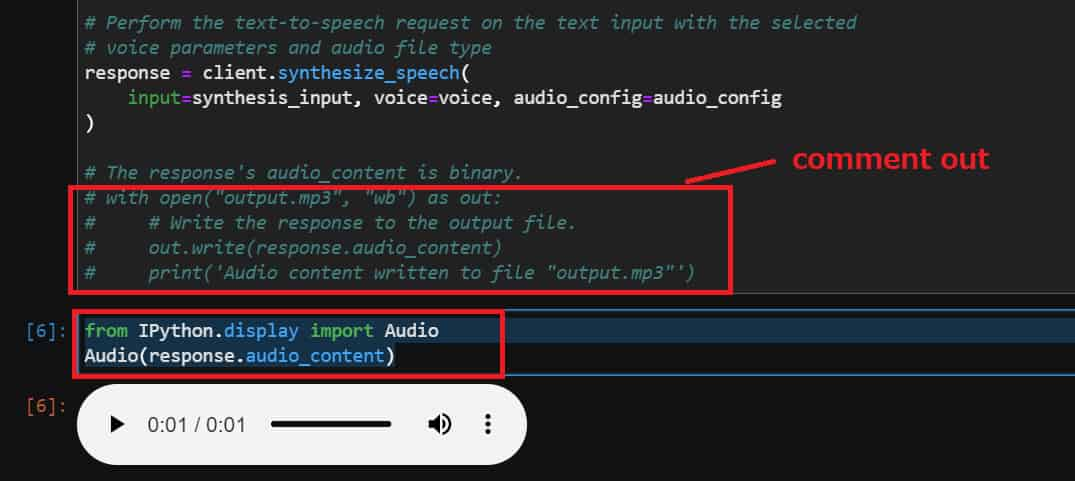
オーディオ再生ボタンがJupyterLab上で表示されて、音声を確認することができます。
2.3音声合成マークアップ言語 SSML(Speech Synthesis Markup Language) で音声出力
マークアップ言語を<speak>読み上げたテキスト</speak>で用意します。
ssml_text = '''
<speak>
  Here are <say-as interpret-as="characters">SSML</say-as> samples.
  I can pause <break time="3s"/>.
  I can play a sound
  <audio src="https://www.example.com/MY_MP3_FILE.mp3">didn't get your MP3 audio file</audio>.
  I can speak in cardinals. Your number is <say-as interpret-as="cardinal">10</say-as>.
  Or I can speak in ordinals. You are <say-as interpret-as="ordinal">10</say-as> in line.
  Or I can even speak in digits. The digits for ten are <say-as interpret-as="characters">10</say-as>.
  I can also substitute phrases, like the <sub alias="World Wide Web Consortium">W3C</sub>.
  Finally, I can speak a paragraph with two sentences.
  <p><s>This is sentence one.</s><s>This is sentence two.</s></p>
</speak>'''
音声合成マークアップ言語のサンプル取得元はこちら。
テキストをマークアップで用意したら、変数に格納してSynthesisInputの引数に以下のように渡します。
synthesis_input = texttospeech.SynthesisInput(ssml=ssml_text)
上記以外はサンプルのままでOKです。
Audio(response.audio_content)
juoyterlab上に音声出力またはmp3ファイルで出力。
with open("output.mp3", "wb") as out:
    out.write(response.audio_content)
    print('Audio content written to file "output.mp3"')
自動生成された音声(SSML)
日本語音声では棒読み感があるものの、英語音声だと自動音声とは思えないほどのクオリティーだと思います。